Prerequisites
Before getting started, make sure you have completed the following steps:
Install Node.js 20+ and npm
Set the SALESFORCE_INSTANCE_URL in your .env file
SALESFORCE_INSTANCE_URL=https://your-instance.salesforce.com
Configure a Salesforce OIDC connection in Auth0.
- Under the General section, ensure the following Scopes:
openidapirefresh_tokenoffline_access
- Under the Purpose section, make sure to enable the
Use for Connected Accounts with Token Vault toggle.
- When the tool calls
auth0.getAccessTokenForConnection(), pass sfdc as the connection name to get a Salesforce access token.
import { openai } from "@ai-sdk/openai";
import { streamText, tool } from "ai";
import { z } from "zod";
import { auth0 } from "@/lib/auth0";

export const maxDuration = 60;

export async function POST(req) {
  const { messages } = await req.json();

  const system = `You're a helpful AI agent that helps analyze salesforce data`;

  const response = streamText({
    model: openai("gpt-4o"),
    messages,
    system,
    maxSteps: 10,
    tools: {
      listOpportunities: tool({
        // salesforce tool call to get a list of opportunities
        description: "Get a list of opportunities from Salesforce",
        parameters: z.object({
          limit: z
            .number()
            .default(10)
            .describe("The maximum number of opportunities to return"),
        }),
        execute: async ({ limit }) => {
          const instanceUrl = process.env.SALESFORCE_INSTANCE_URL;

          const endpoint = `query/?q=${encodeURIComponent(
            `SELECT Id, Name, StageName, CloseDate FROM Opportunity LIMIT ${limit}`
          )}`;
          const url = `${instanceUrl}/services/data/v57.0/${endpoint}`;

          // call auth0 to get the access token
          const { accessToken } = await auth0.getAccessTokenForConnection({
            connection: "sfdc",
          });

          const response = await fetch(url, {
            method: "GET",
            headers: {
              Authorization: `Bearer ${accessToken}`,
              "Content-Type": "application/json",
            },
          });
          return await response.json();
        },
      }),
    },
  });
  return response.toDataStreamResponse();
}
2. Call from the frontend Chat UI
Use the @ai-sdk/react hook to wire up the chat component:"use client";
import { useChat } from "@ai-sdk/react";
export default function Chat() {
const { messages, input, handleInputChange, handleSubmit } = useChat();
return (
<div className="flex flex-col w-full max-w-3xl py-24 mx-auto stretch text-gray-100">
{messages.map((message) => (
<div key={message.id} className="whitespace-pre-wrap">
{message.role === "user" ? "User: " : "AI: "}
{message.parts.map((part, i) => {
switch (part.type) {
case "text":
return <div key={`${message.id}-${i}`}>{part.text}</div>;
}
})}
</div>
))}
<form onSubmit={handleSubmit}>
<input
className="fixed bottom-0 w-full max-w-3xl p-2 mb-8 border border-zinc-300 rounded shadow-xl"
value={input}
placeholder="Say something..."
onChange={handleInputChange}
/>
</form>
</div>
);
}
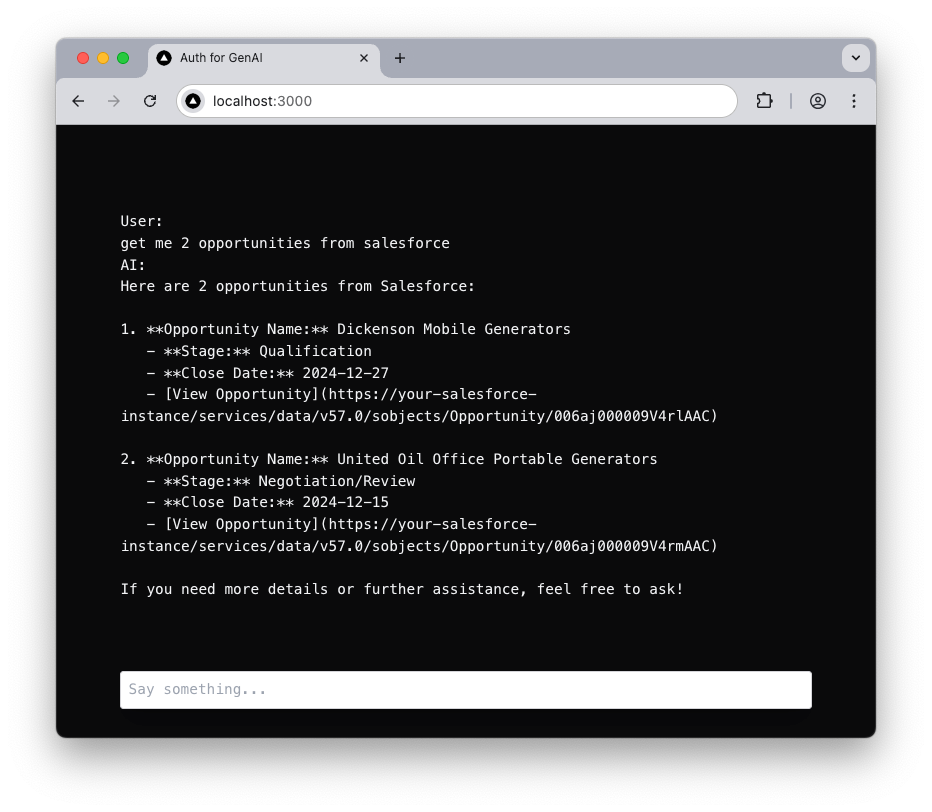
3. Example UI
Navigate to https://localhost:3000 to see the chat UI:You can customize the chat UI to display structured results in tables, charts, or summaries. When the user sends a message like Get me 2 opportunities from Salesforce, GPT-4 interprets the request and invokes the listOpportunities tool, which securely calls the Salesforce API using access tokens obtained via Auth0 and returns the results. Next.js
 LangChain
 LlamaIndex
 GenKit